There is a circuits diagram on the Maytech page which makes it easy to connect the remote receiver and the VESC together using the pinout picture on the MakerX page.
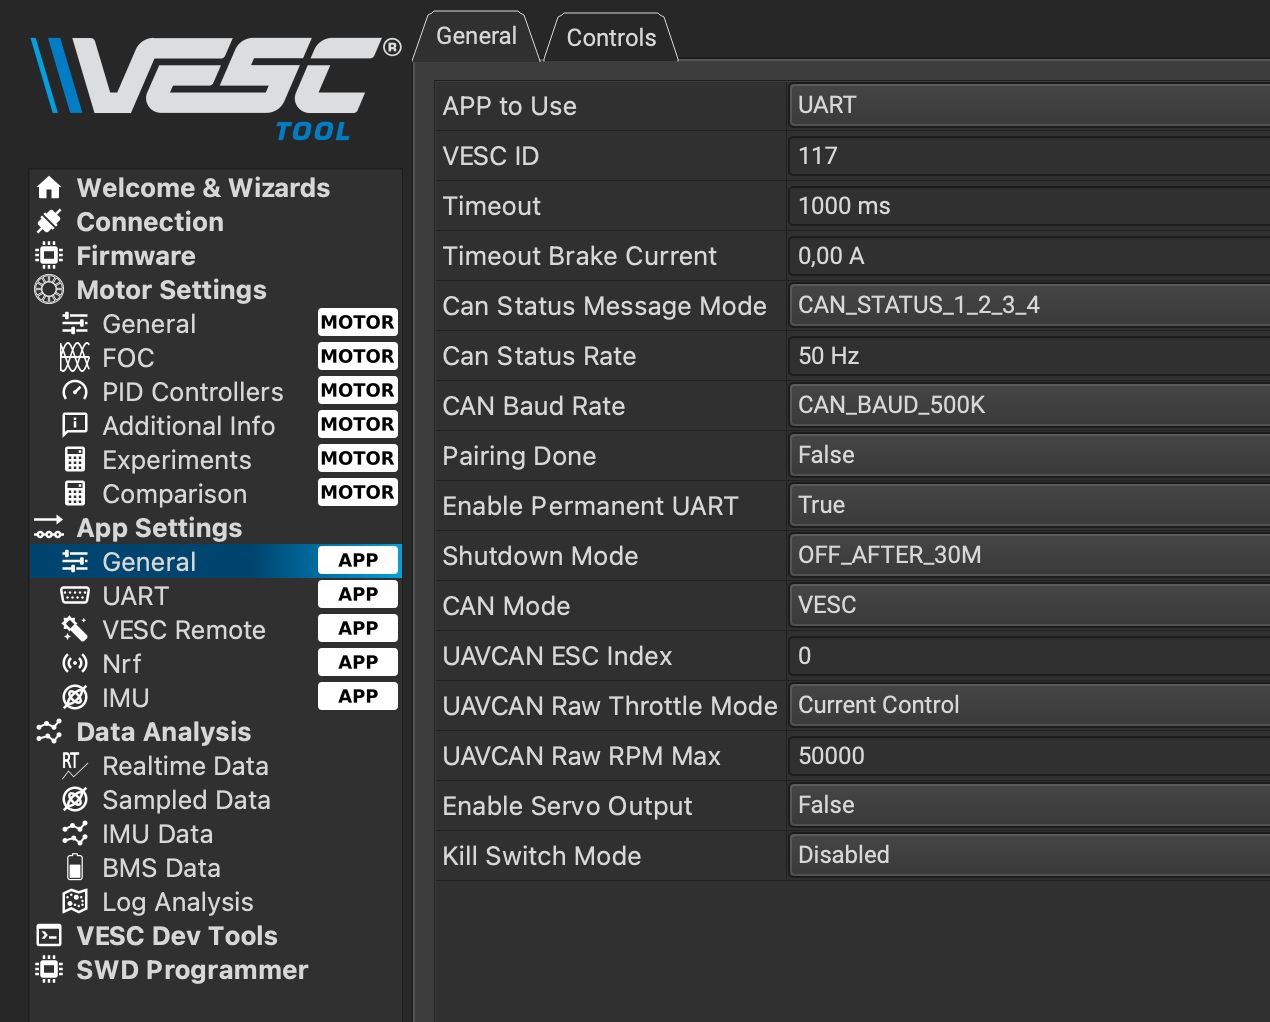
VESC App settings:
if you are using firmware version 5.03 (VESC TOOL 3.1) or above – turn off the phase filter, see here for more details
Set App to Use to UART – gives much quicker response than the Maytech recommended UART and PPM.
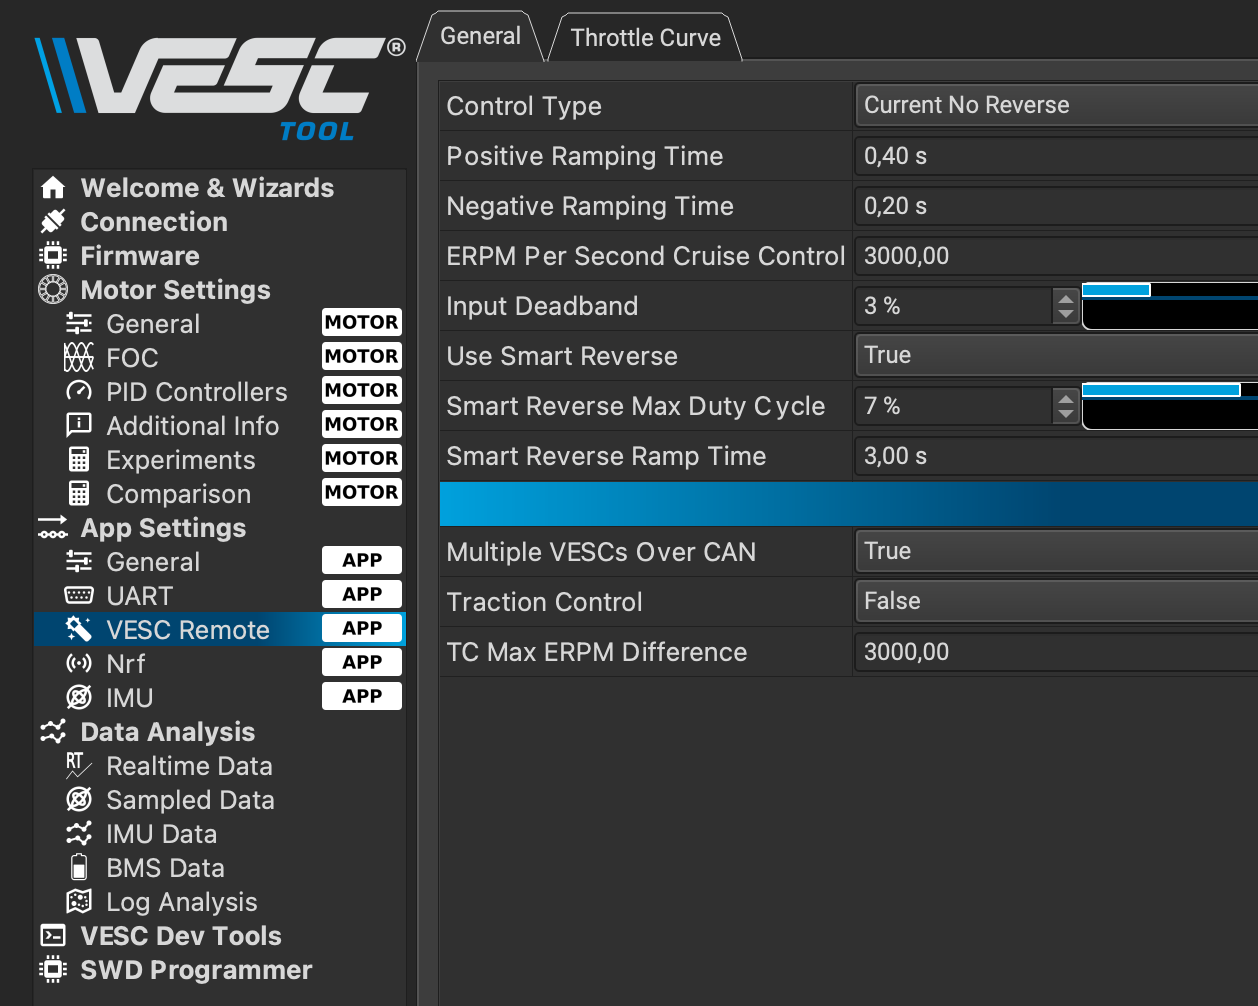
Use the Maytech recommended Control Type: Current No Reverse under VESC Remote
For quicker response on the remote, change the Input Deadband to something like 3% under VESC Remote
VESC Motor Settings:
Set Motor Current Max to 140A
Do not set Motor Current Max Brake to 0A but some negativa number like -1A
Set Absolute Maximum Current to 180A
Here are some screen dumps to better explain the settings
App to Use: UARTVESC Remote settingsMotor Settings
Started flying FPV in October 2020 but have since then blown a couple of ESC. And each time I’m going to setup the new ones I ran into problems so this time I write down some notes to not have that happen again…
The most common problem I run into is that I turn on Bi-directional DShot in BetaFlight but then I get RPM_FILTER Disarm disabled flag turned on!! And cannot figure out why??
The answer and solution is quite simple. The default ESC firmware does not support bidirectional DShot! And this article describes how to get it. The ESCs I have one need to use BLHeli_S firmware. On my Nazgul 5 2 HD the ESC has the G H 30 configuration and currently I’m using version 16.73. So I download the G_H_30_REV16_73.HEX firmware and use BLHeli Configuration to flash it. Other versions can be downloaded from https://github.com/JazzMaverick/BLHeli/tree/JazzMaverick-patch-1/BLHeli_S%20SiLabs
I wanted to have a live video stream from my Snapmaker 2.0 since it now has got a space in a closet. After a couple of tries to use a live video stream from the XiaoFang camera I realized it would not be a good solution. Quite a lot of tweaking to get it to work and it would require quite some resources from the Raspberry and thus might affect prints. But I still wanted to use that camera since I already had it.
After looking through the OctoPrint forum I saw that some people had used a special firmware on Wyze cameras to just make them into webcameras and connect directly to the Raspberry. The Wyze camera and the XiaoFang are the same camera, but wonder if it would just work to use that firmware? Found an article indicating it should work so gave it a try. Went to the firmware page and followed the instructions. Built a USB A to USB A cable and connected the camera to my PC. Wow, it is a webcam! Connected it the the Raspberry and entered the default settings for camera. Voila!
Last summer I got a Xiaomi XiaoFang 1S camera from Magnus. Tried to get it working then but never succeeded but today I got some inspiration and managed to get it working and stream video over RTSP! It was not so hard. Just go to the GitHub project Xiaomi-Dafang-Hacks and follow the instructions but one must know that it was a T20L so start with those specific instructions.
One thing also that might have made a difference, now this time I did this on my Windows machine and not my Mac. And really made sure the SD card was formatted as a FAT32 drive.
Also found this firmware that looks interesting; OpenMiko
To setup my Raspberry Pi Z W I have combined two different guides since editing the files on the SD did not work, nor did I had the energy to setup Vagrant.
Start by flashing a micro SD card as described here using Etcher.
Insert the card into a Mac or PC and add enable_uart=1 to the end of config.txt as described here.
Insert the SD card in the Raspberry Pi and boot it as described here using a USB serial cable. Then in a terminal window run screen /dev/tty.usbserial-A7005Gpd 115200 (change to your device tty) to connect to the serial terminal on the Raspberry Pi.
Now you can follow this guide from step 3. Though I did not configure mine for two networks and here are how my configuration files look like:
Fick ju lite problem med skrivaren på grund av felaktiga inställningar och var lite fundersam till hur plockar man isär den och sedan sätter ihop den för att få bort plast som fastnat. Som tur är har andra redan gjort det och det fanns bra filmer på YouTube. Denna tyckte jag var bäst.
En sak som är viktig vad gäller PrimaCreator skrivaren är att den säljs under flera olika namn och det vanligaste verkar vara MonoPrice Select Mini och söker man på det hittar man tex denna utmärkta Wiki med gott om kunskap om skrivaren och instruktioner.