I found https://github.com/koosoli/ESPHomeDesigner before Christmas and it seemed to be a really nice tool so decided to try it out. And soon I was contributing some. Here is some notes from that.
cd /tmp
git clone https://github.com/koosoli/ESPHomeDesigner.git
cd ESPHomeDesigner
git switch testing
git pull
cp -r custom_components/esphome_designer /homeassistant/custom_components
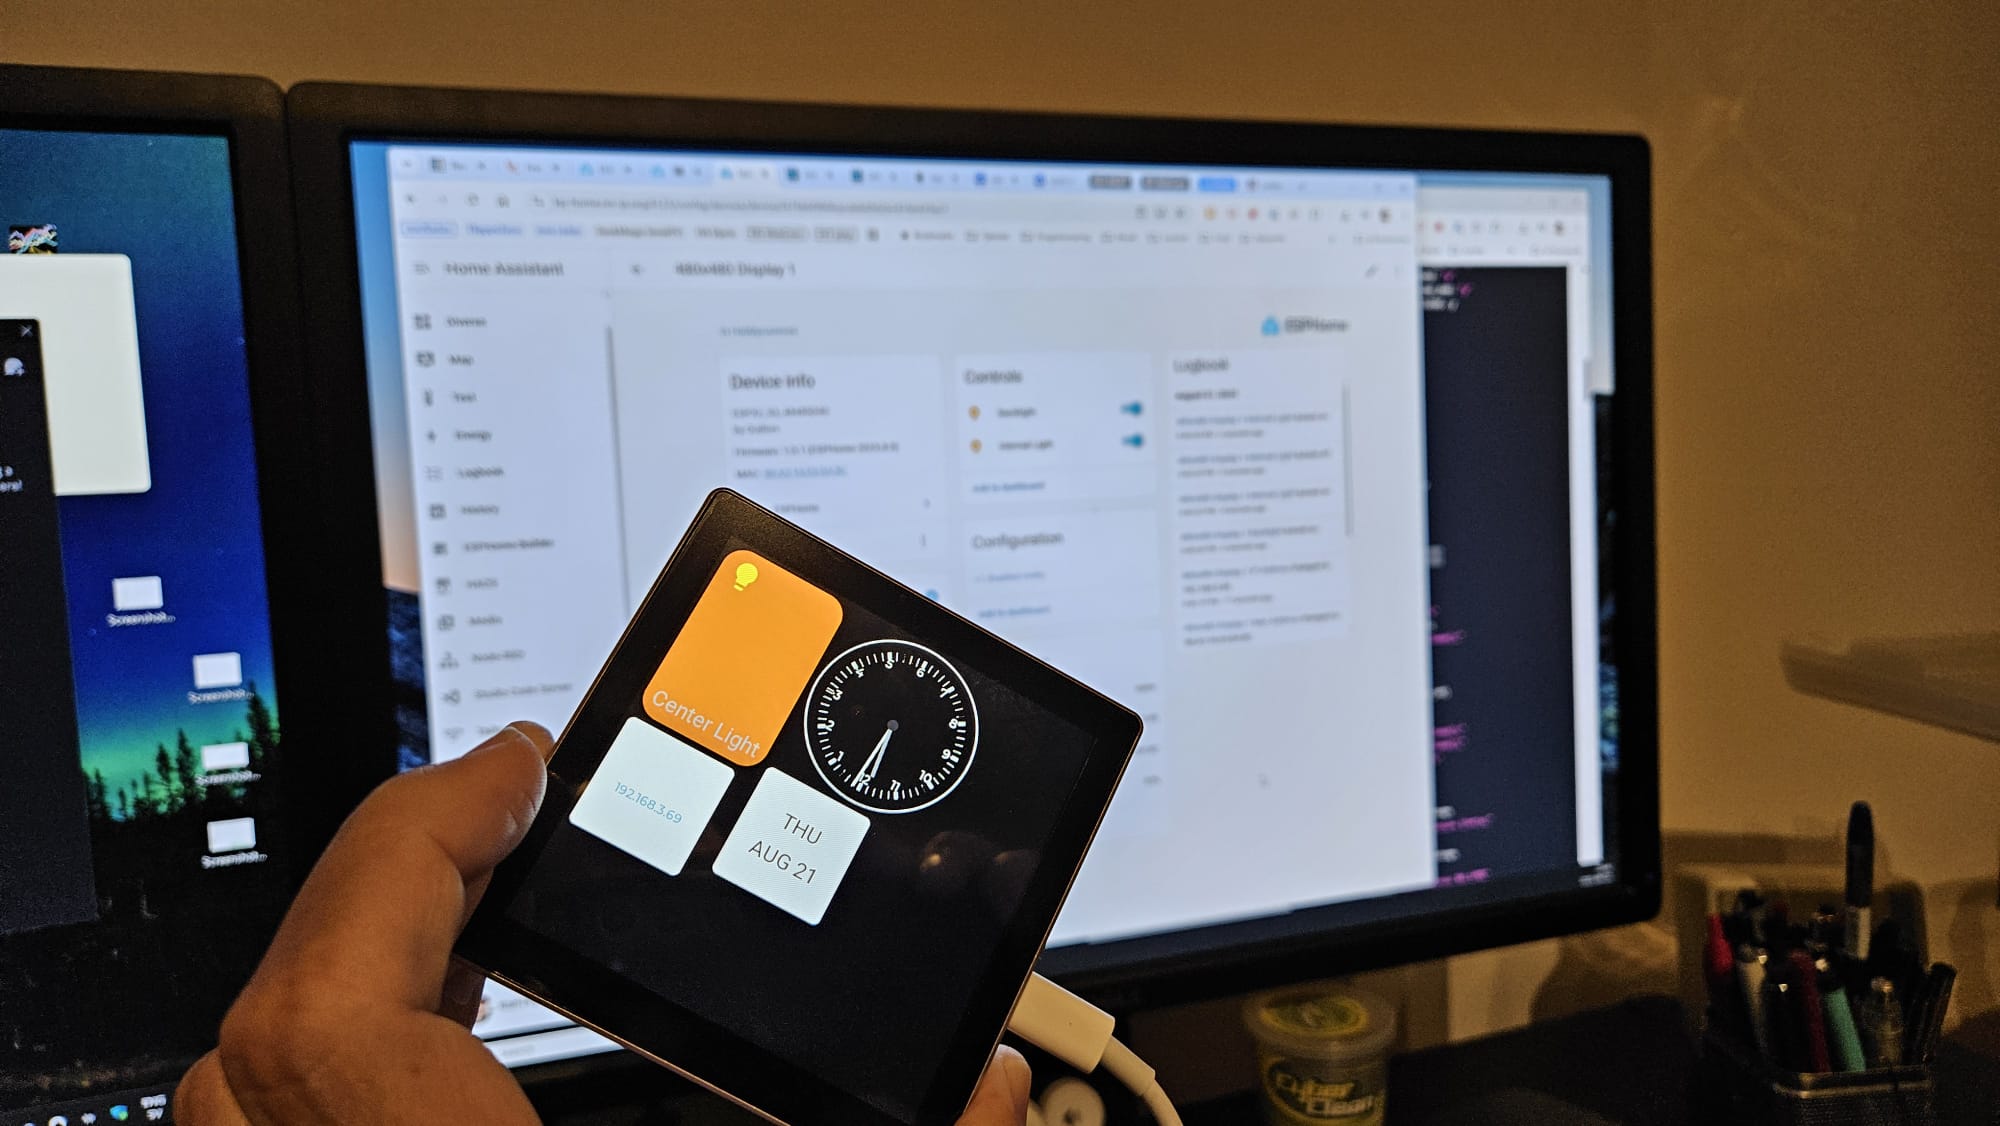
One of my friends told me about the Guiton capacity touch display with GT911 and an integrated ESP32. And it did not cost that much. The Guiton ESPHome config made it easy to get it working in Home Assistant
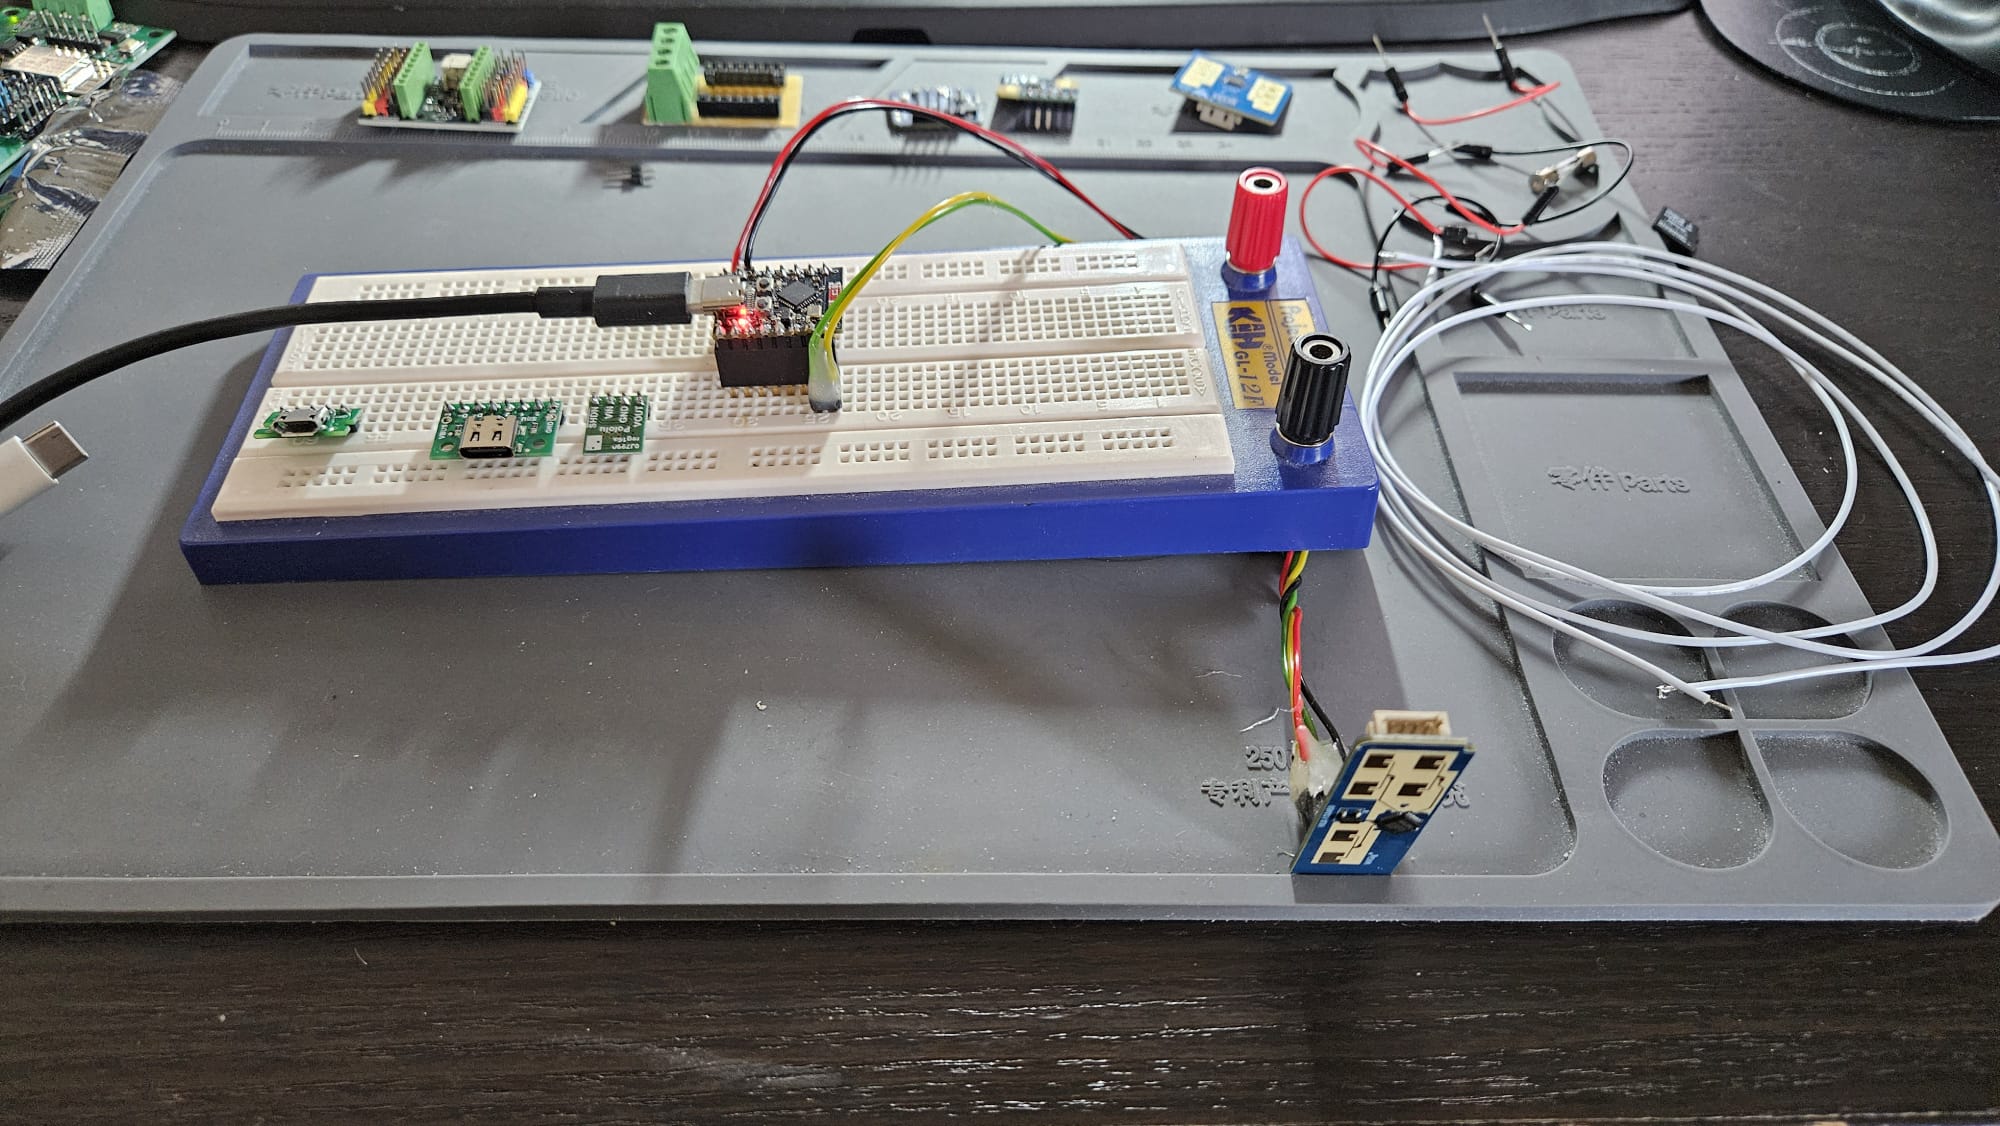
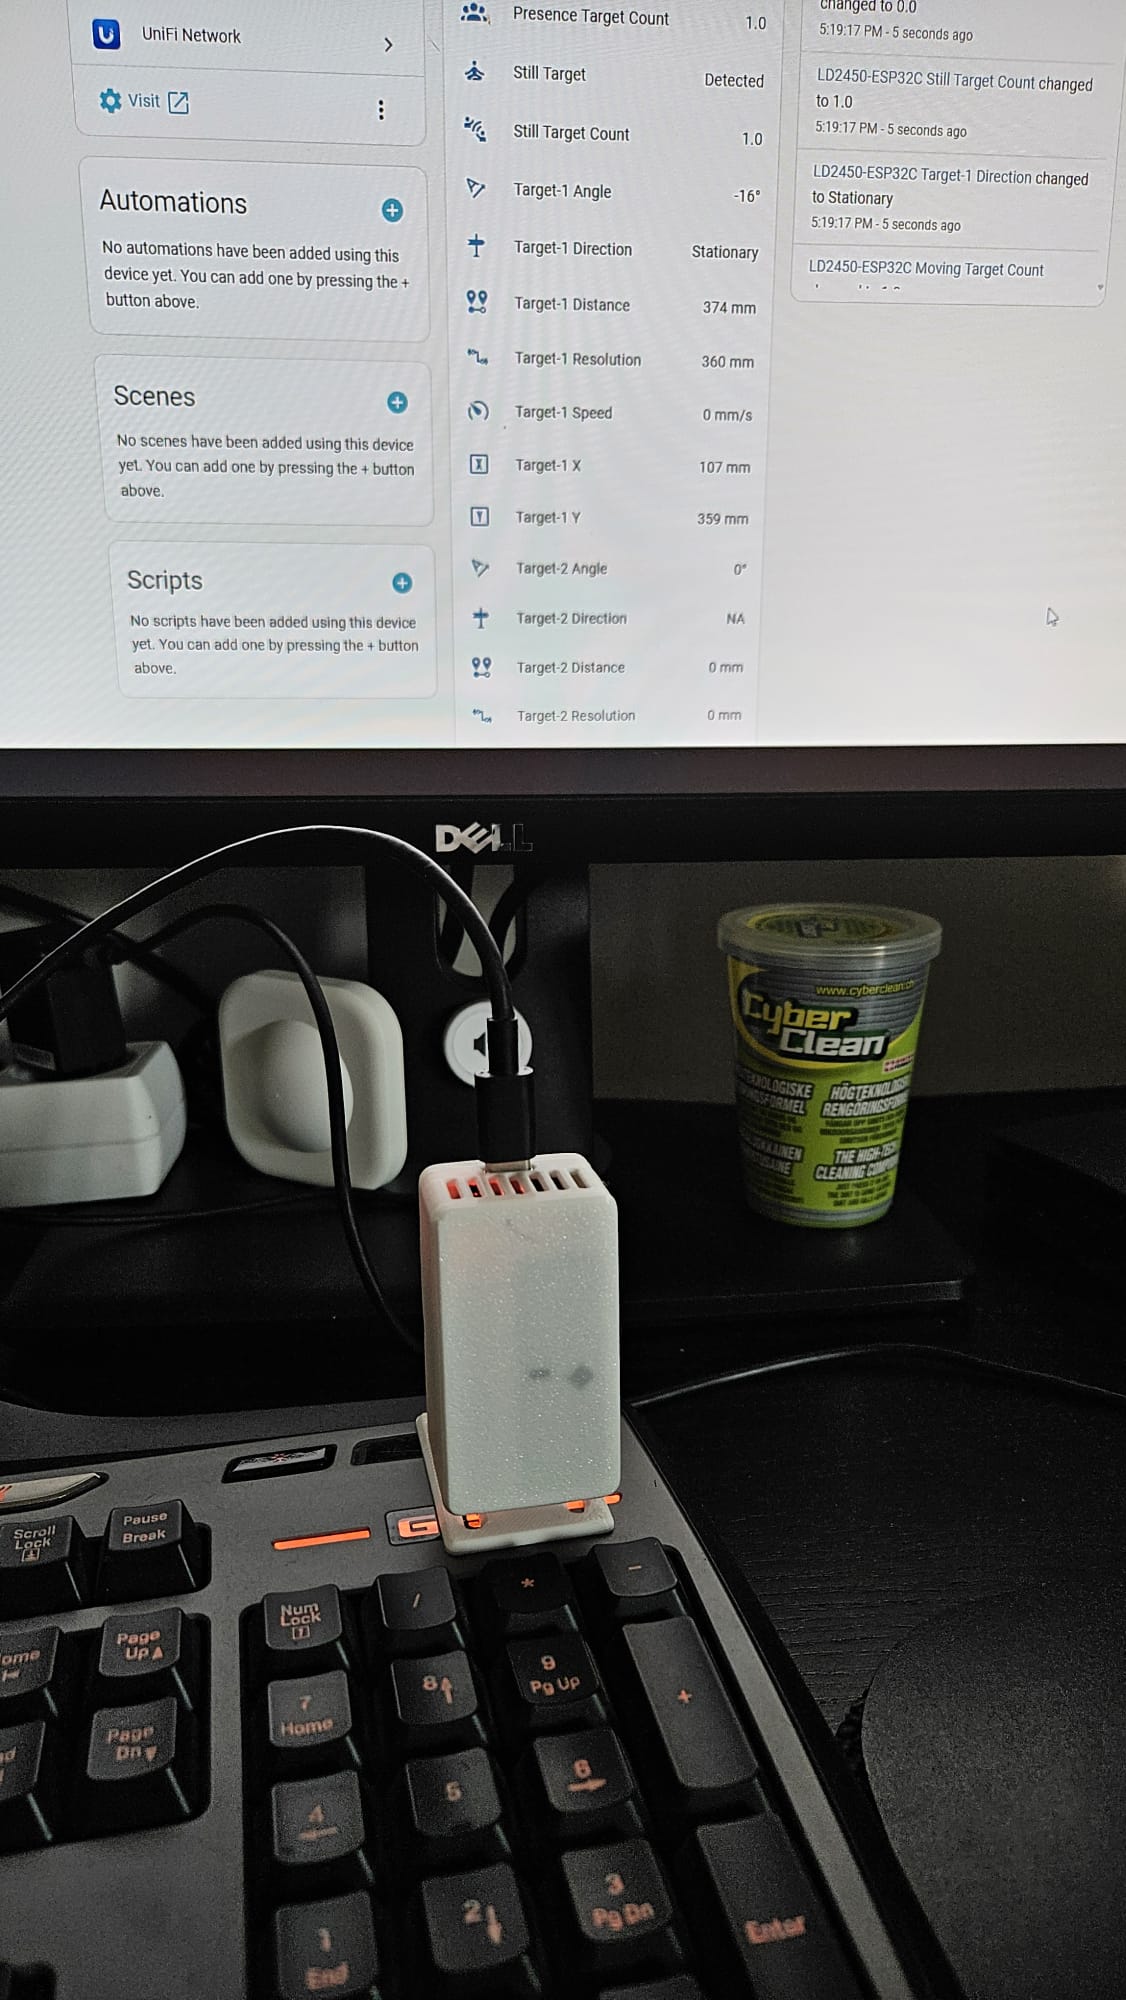
Some time ago I read about these and they were did not cost much. I bought these from AliExpress. So I ordered some different ones. Recently I found some time to experiment with one of them, the LD2450 (The AliExpress item I bought). On the product page there is a link to a Google drive with documents and software for this module.
I had previously tried one of the others briefly but unsuccessfully. So this time I took a bit different path.
I read that several (maybe all?) of these has built in Bluetooth so I downloaded the HLKRadarTool (iOS or Android) to my phone and powered up the module and connected the phone to it. It worked directly and it was easy to evaluate how the device performed.
Once I know it worked well it was time to connect it to an ESP32. The manual made it easy to understand what pins to use on the radar module. I had some ESP32-C3 modules at home so I decided to use it. The model I had was Tenstar Robot Super Mini and the pinout made it easy to figure out how to connect RX and TX on the sensor to TX and RX on the ESP32.
Wanted to experiment a bit with Home-Assistant while travelling. And wanted to be able to run as much as possibly locally on the laptop instead of connecting to my home setup since network connectivity is not always reliable.
So here is a short summary how I set it up.
Docker Desktop
I already had Docker Desktop setup with a free Docker Personal account. If you do not have it setup already, download and install it.
Then start the the container or containers with docker compose like
docker-compose up -d
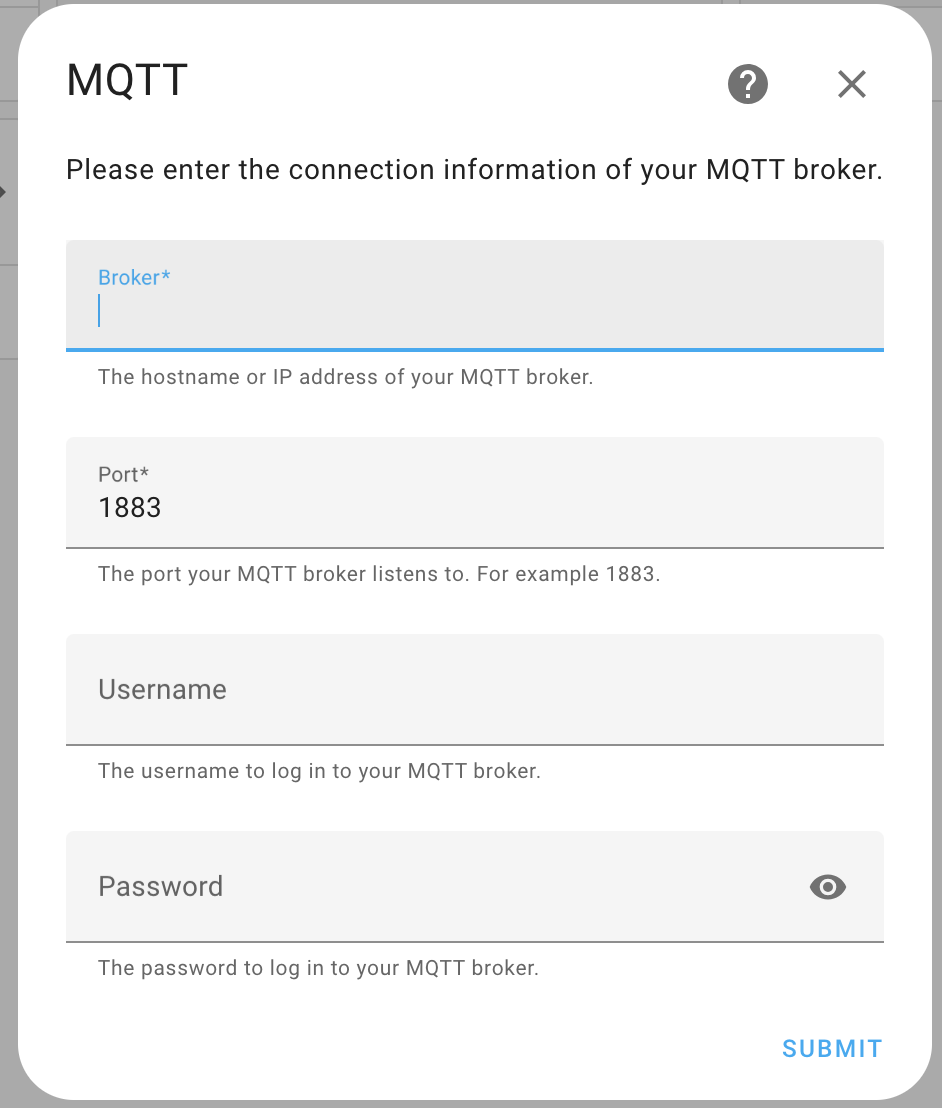
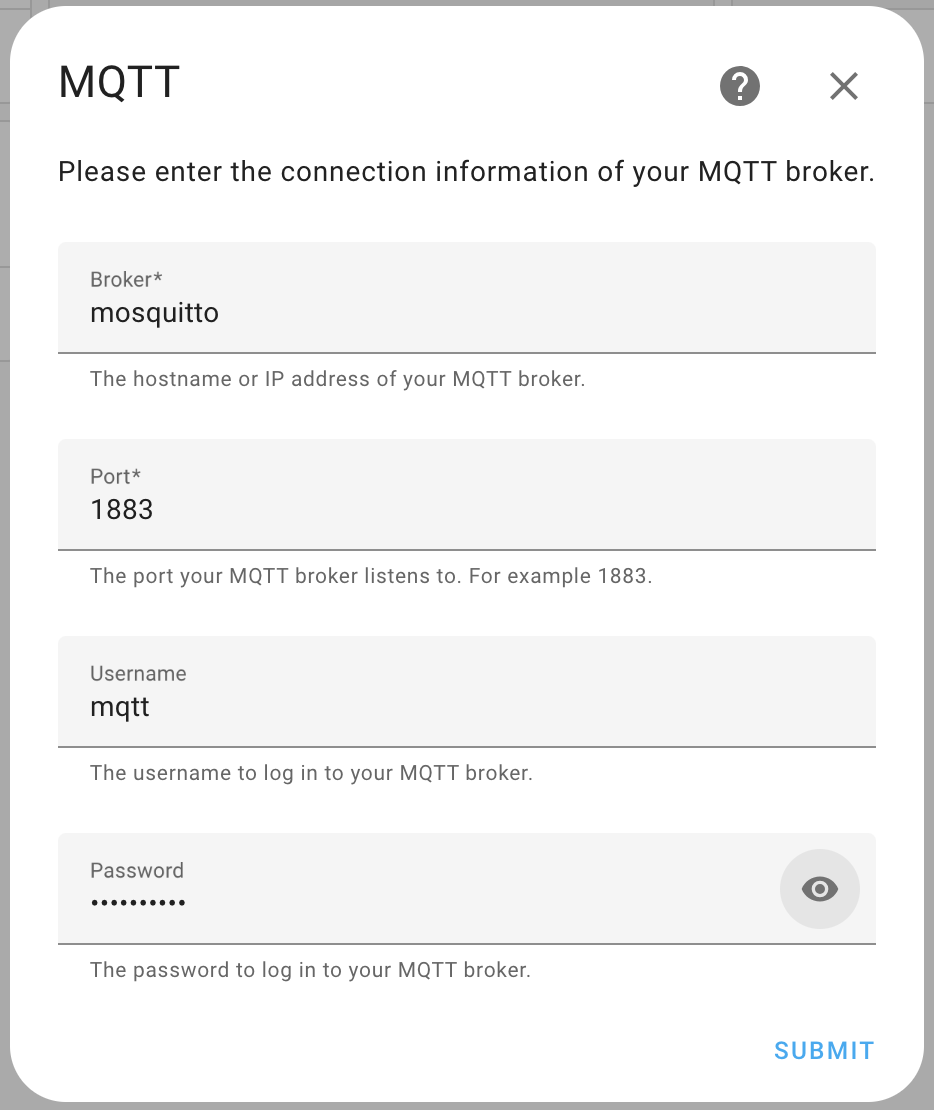
Configure login to mosquitto
You now have both Home Assistant and Mosquitto running but before connecting the two you want to setup authentication in Mosquitto. This is just a simple setup with only one account.
In Docker Desktop, view your containers by clicking Containers in the left menu. Find the mosquitto one and click on its name. Then select the Exec tab and execute the following command